Modify The Netmask on windows DHCP Server
Modify The Netmask on windows DHCP Server
- İlgili Scope Powershell ile dışarı export edilir.
1
Export-DhcpServer -ComputerName <FQDN> -Leases -File C:\dhcp.xml -ScopeId x.x.x.x -Verbose
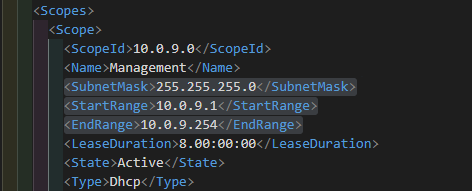
- Export edilen XML Dosyası notepad ya da diğer herhangi bir araç ile açılarak düzenlenmek istenilen alanlar düzenlenir ve dosya kaydedilir.
1
2
3
4
5
6
7
8
9
10
11
12
.....
<Scopes>
      <Scope>
        <ScopeId>10.0.9.0</ScopeId>
        <Name>Management</Name>
        <SubnetMask>255.255.255.0</SubnetMask>
        <StartRange>10.0.9.1</StartRange>
        <EndRange>10.0.9.254</EndRange>
        <LeaseDuration>8.00:00:00</LeaseDuration>
        <State>Active</State>
        <Type>Dhcp</Type>
.....
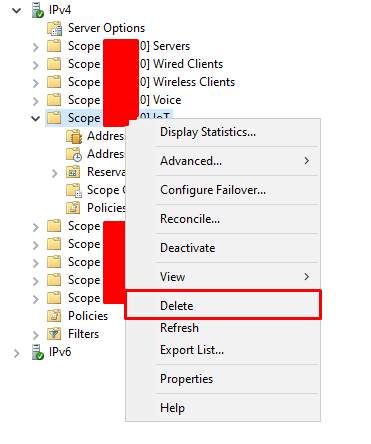
- Ardından Export edilen scope silinir ve scope yeniden import edilir.
1
Import-DhcpServer -ComputerName <FQDN> -File C:\dhcp.xml -ScopeId x.x.x.x -Leases -Verbose -BackupPath C:\dhcp_backup
- Herhangi bir hata mesajı almadıysanız eğer DHCP Yönetim Konsolundan Scope’u kontrol edebilirsiniz.
This post is licensed under CC BY 4.0 by the author.